Tuesday, August 2, 2011

Pinterest Challenge July 2011 | Details {Plates}

 On the left is the inspiration pin and the right is the finished project.

The hanging plate component of the project took just as long as the painting part as far as wait time. There was lots of looking and nudging and photographing to get it right. To start, I looked around the house to figure out what I already had.  I knew this was something that I would want to change or add to as I find different plates.

I was able to gather 6 of the 8 plates, so in the end I did purchase two of them. After gathering the plates, I laid them out on the dining room table to get a feel for placement.


 The plate next to the "cat" plate did not make the final cut.


Fortunately the short side of the dining table was almost exactly the same length for the top of the cabinet.  After deciding on an arrangement, I laid down craft paper to outline the plates to use as a pattern for nailing the hangers.


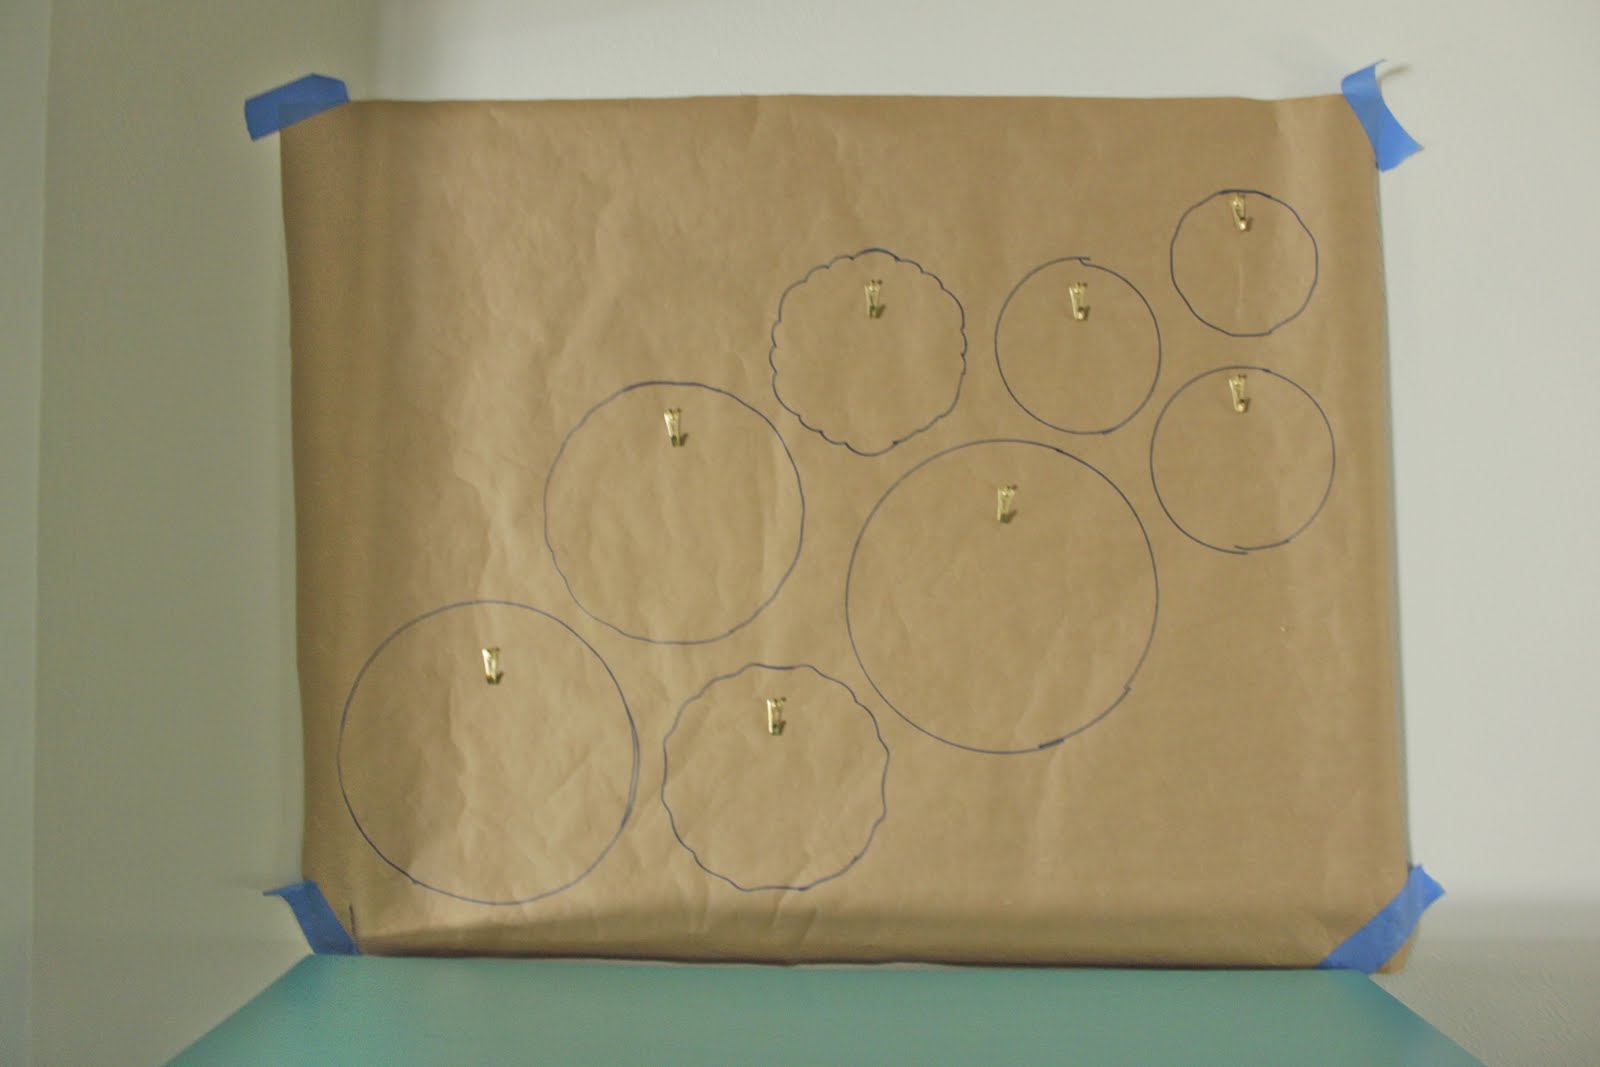
Next I taped the paper to the wall, which was a very annoying task.  After checking out the pattern, I ended up making two more patterns to adjust the spacing.  After the spacing was fixed, I put the plate hangers on each plate.  Some plates were easier than others due to sizes of plate hangers and the diameter of the plate.  I would definitely recommend that you buy a few extras just in case one gets bent too much or even so you have some to add to the display in the future.

For the hanger hook placement {provided with each plate hanger} I held the nail in the hanger hook in one hand and placed the plate, held by the other hand, on the hook.  I centered the plate in the designate place on the pattern pushed gently to make a small mark so I knew where to nail.  I repeated the process for each plate and all were extremely close to matching the outline on the pattern.


 After all of the the hanger hooks were up and the plates look good in their spots,  I removed the plates from the hooks and gently tore off the paper from the wall.


In case you are curious about where the plates are from, the blue cat plate and the red plate are from Anthropologie, and I purchased those.  The yellow "B" plate is from La Plates. The three white/cream plates are from our everyday dishes and are made by Villeroy and Boch.  The blue and white saucer is a blue willow pattern, and the last plate with the black, pink and gold rim is an antique I somehow acquired from my mom.


The plate hangers used in the photos I purchased from Home Depot in a mad rush to get the project completed on time.  If you look at the photos close enough you can see the prongs on the plate hangers are more like snaggle teeth that delicate little plate holders.  I found some at Target that were silver and smaller in the part that curves over the front of the plate.  I am considering trying those, but when I tried to get one on the biggest plate {blue cat} I mangled it beyond recognition.  Good thing they were only a couple of bucks.  As another idea, I am thinking about snipping the ends to make them smaller.  This is probably my biggest disappointment of the project. I kinda like the idea of a little gold though that the snaggle hangers offer.


For accessories, I went with two glass CB2 vase/candlesticks and a red recycled glass chickadee vase from Arhaus.  I have two large white pillar candle holders from Zgallerie that also look good, and that is a better match to the inspiration pin.  However, I am obviously not going for a match but just more of the same feel of the piano pin.


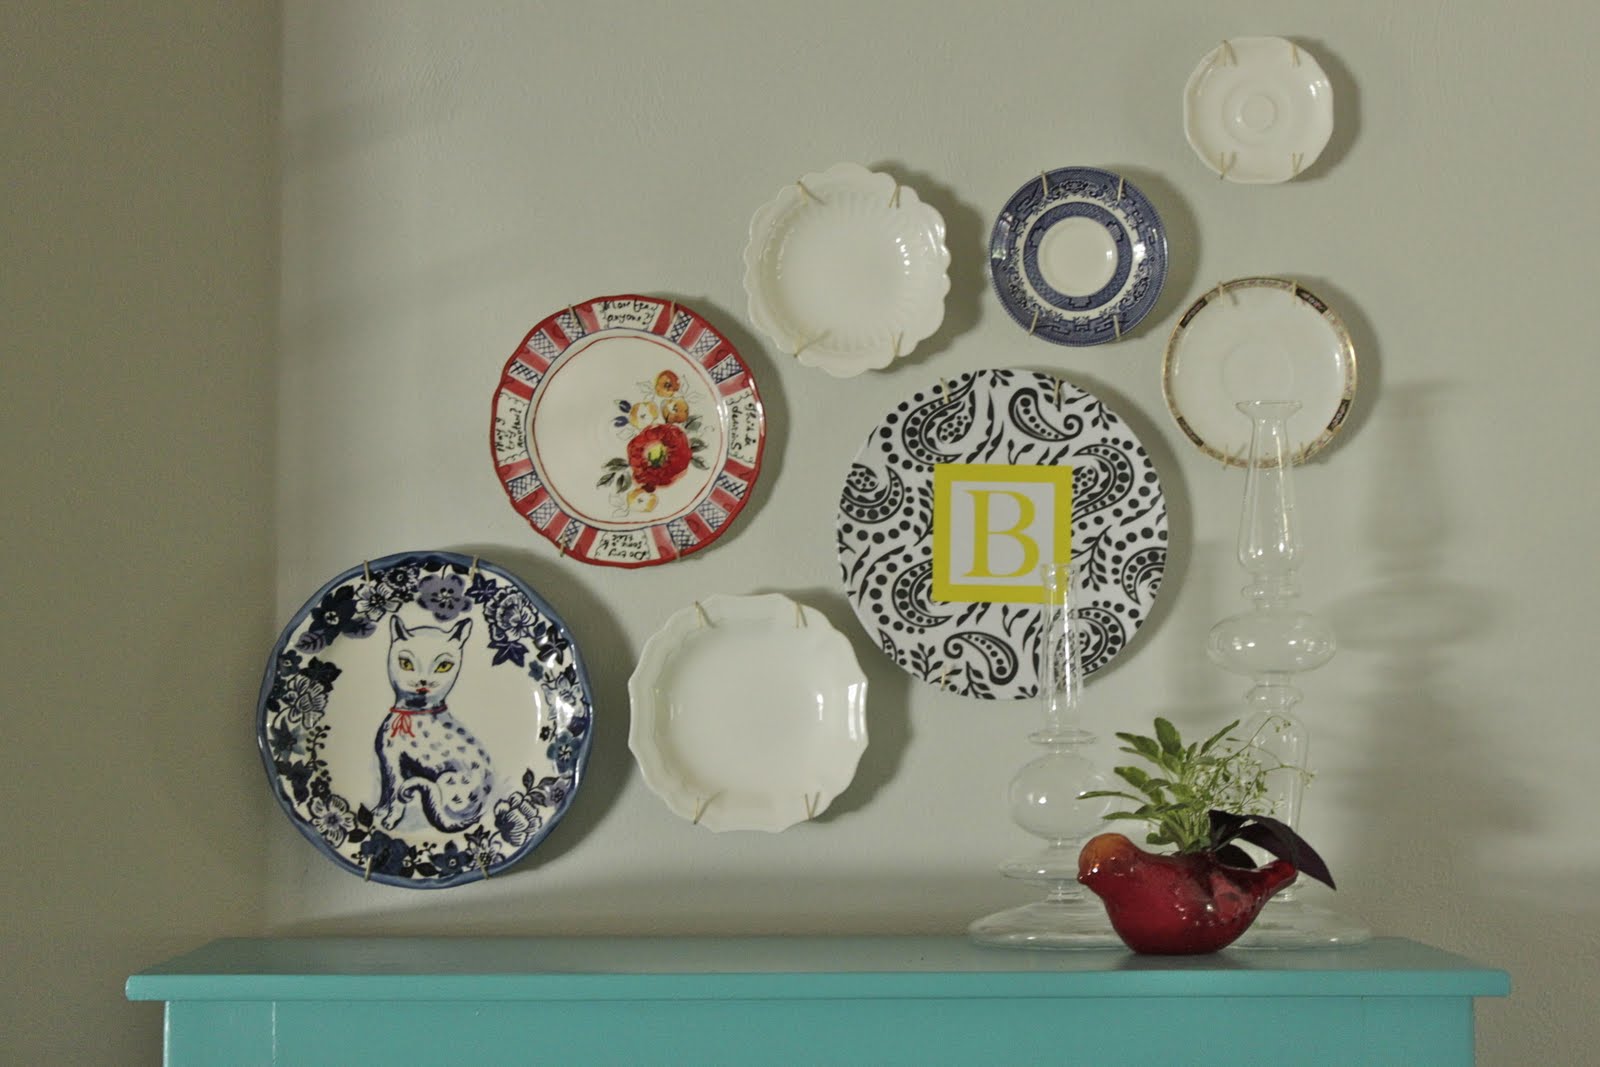
A little greenery completes the accessorizing!  I will be honest that they were only in the vase for the length of time that it took to take the photos.  I wish I could have live plants inside the house, but my two cats would just devour them.


That is it! In case you would like to see the inspiration pin and the finished project together here you go!

Pinterest Challenge July 2011 | Details {Teal and Faux Bois}


The photo on the left is my inspiration pin, and the photo on the right is my completed project!

Details about the plate hanging part of the process can be found here. If you want a overview of the entire project with less details, click here.

I am shocked at how the images look like the same color!  I do not know exactly what color the piano is.  Addicted 2 Decorating lists the suggested paint color as Behr's Teal Bayou (530D-6).

 {Home Depot, Teal Bayou}

I wanted something a little more greenish teal, so I decided to use Behr's Teal Zeal.
 {Home Depot, Teal Zeal}

The results were not quite right.  I moved the cabinet into the dining room to check out the color in the room that it would reside and decided it was just a little too light. 


The frame on top is painted in Valspar's Exotic Sea.  I had a sample of this color that I was able to get for 50 cents due to some of the white base had leaked when shaken.
{Lowes, Exotic Sea}

So I decided to mix a 1:1 ratio of Exotic Sea and Teal Zeal for a combined color of Exotic Zeal! {Obviously I am making that up, sounds very Emily Henderson style diagnostic like though}

Teal Zeal is on the left and Exotic Sea on the right in the above and below photos.


The paint stick is the combo.  It is definitely more on the Exotic Sea side due to the darker nature of the color and since I did a 1:1 ratio.  I am happy with the results. Before painting, I scrapped off old paint completed off the top and sanded to rough up the rest of the cabinet.

I was not intending for it to be so close to the piano color, it was kinda a happy accident. The inside and the shelves {except for the faces} are painted black.  So overall the painting part was successful. I tackled this part of the project first so the paint would have time to cure a little before loading and accessorizing. I went ahead and used the hardware that was on the cabinet before but have been looking at different hinge and knob options.  I think a black and white patterned knob would be a cool look.

The back of the cabinet was painted gray for the previous red paint makeover.  I wanted to keep it gray but add a faux bois pattern to it.  I have been dying to do something faux bois for a while. 

I purchased the Martha Stewart faux grain wood rocker tool for just under $6 at Home Depot.  I had some white acrylic craft paint and extender medium from another project so I whipped up Martha's glazing recipe of 1:1:2= 1 part paint, 1 part extender medium, and 2 parts water from her How-To. I watched the video from the how-to and got right to work!


The Martha glazing recipe was very watery, and I did not have anymore white craft paint so I went ahead and used some ultra white wall paint to thicken it up a bit.  As per the video, I worked in small sections.

 The board was stapled to the back of the cabinet when I purchased it from an antique mall, and those marks were proving to cause me some issues when dragging and rocking the wood-grain tool. A few sections I redid many times.


 Here are the finished results and a few detail shots of the grain.


The board was dry to the touch after an hour.  After a day and a half, it was reassembled and moved into the dining room.


You cannot really see the faux bois in the photos but the teal was meant to be the focus anyway.  Well that is half of the project.  Painting provided lots of wait time which was great to use for the plate part of the project!

Monday, August 1, 2011

Pinterest Challenge July 2011 | Project Inspiration and Reveal


Loving Pinterest!  I have several projects that I have pinned for future DIY and recently I completed a big project after accepting the Pinterest Challenge!  I am looking forward to seeing what everyone else has DIY'd over the last week!

The inspiration for my project came from this pin.

 I love the look of the turquoise piano and the hanging plates.  I do not have a piano to paint nor did I plan to try and get one.  What I did have was a cabinet that I was ready to make over {again!}. 
The cabinet not only received a makeover, the dining room recently received a new coat of paint, new base boards, crown molding, and a new back door!  This project became three mini projects in one.  I gloss over the whole project here, but here will give detailed instructions for each part and provide additional photos in separate posts.
Now time for the reveal!

Here is a side by side of the inspiration and results.

Want to know more?

LinkWithin